RV Sink Replacement
See the RecPro YouTube video for this RV sink basin replacement.

Unhook
For most sink replacements, it will be easier if you remove the faucet first. With water turned off unhook the waterlines.

Remove faucet
Lift faucet out and set aside to put back on after the new sink is installed.

Unscrew
To remove the old sink, you need to look under the sink and find the "slip joint." Unscrew it so the draw pipe can be lifted up.

Clips
Find the clips that hold the basin to the counter top. Use a drill or screw driver to loosen the clips for since removal.

Break seal
To remove the old sink basin, score the seal with a blade or other sharp object.
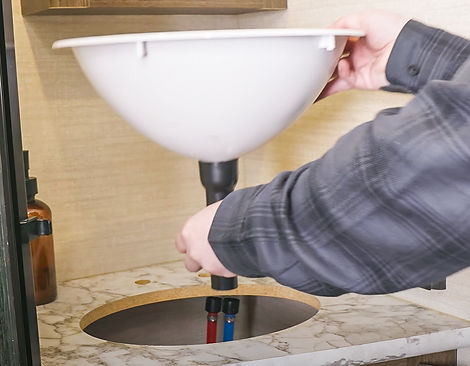
Lift Basin
After the drain pipe, clips, and seal are loose, take out the old sink.

Cement pipe
To seal the drain pipe to the new sink, use rubber cement. Apply to the drain.

Cement basin
Apply the cement to the sink, where the drain pipe will attach.

Attach
Quickly put the drain and the sink parts together before the cement starts to dry.

Replace
Place the new sink into the countertop cutout.

Tighten
Insert the drain pipe into the plumbing, and tighten the joint.
Screw clips
Reattach the clips to hold the sink in place, and tighten with a screwdriver. impact, or drill.
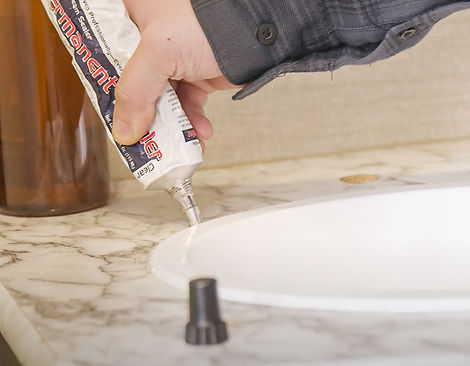
Seal
Use silicon to seal around the edge of the new sink to prevent water damage.

Replace Faucet
Put the faucet back into place and attach the waterlines.

Completed Sink
Enjoy your newly upgraded sink! See new sink and faucet options on RecPro's site.